How to Deploy a 3-Tier Web App Architecture on AWS with VPC
Step-by-Step Instructions for Creating a Secure and Scalable AWS Cloud setup
Hey! I’m Vishal Gurjar, a passionate DevOps Engineer skilled in automation, CI/CD, and cloud-native applications. 💡 Skilled in Docker, Kubernetes, Jenkins, AWS, GitHub Actions, and Linux. 🔨 Built real-world DevOps projects like Robot Shop & Netflix Clone with scalable pipelines. 📚 Documenting my journey through blogs/tutorials to help others learn faster. 🤝 Open to collaborations, freelancing, and exciting DevOps opportunities.
In this project, I designed and set up a 3-Tier Web Application architecture within a custom Virtual Private Cloud (VPC) using AWS services. This setup follows industry best practices for security, scalability, and separation of concerns.
🔒 Secure | ⚙️ Modular | ☁️ AWS-Powered
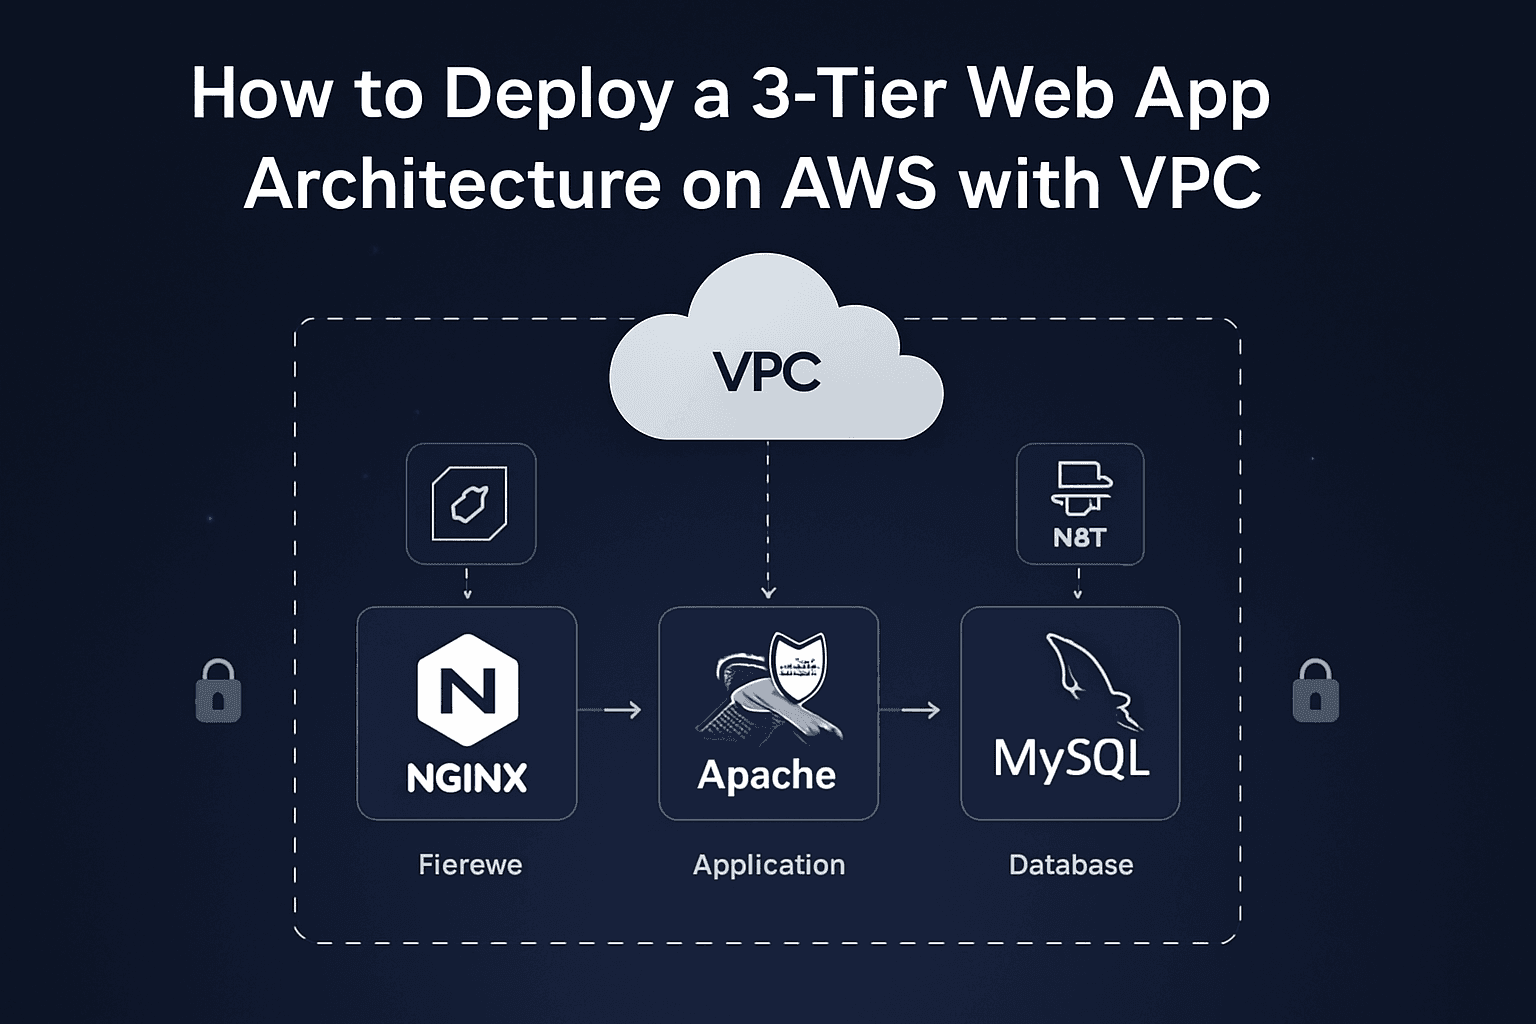
In this blog, I’ll show you how I deployed a 3-tier application on AWS using a custom VPC. This architecture includes:
Nginx as a Reverse Proxy (Web Layer)
Apache Tomcat as the Application Server
MySQL as the Database Server
🧱 What is 3-Tier Architecture?
A 3-tier architecture separates the app into:
Web Tier (Nginx) – Handles incoming HTTP requests
App Tier (Tomcat) – Runs backend application logic
DB Tier (MySQL) – Stores application data
🔧 Tech Stack & AWS Services Used
| Layer | Component | AWS Service |
| Web | Nginx | EC2 in Public Subnet |
| App | Tomcat | EC2 in Private Subnet |
| DB | MySQL | EC2 in Private Subnet |
| Network | VPC, Subnets, Route Tables | AWS VPC |
| Others | NAT Gateway, IGW, SGs | AWS Infra |
🗺️ High-Level Architecture Diagram
This setup includes:
1 Public Subnet for Nginx
2 Private Subnets: App Tier (Tomcat) and DB Tier (MySQL)
Security Groups with limited, directional access
NAT Gateway for outbound internet access from private subnets
🪜 Step-by-Step Implementation
✅ Step 1: Create VPC
- CIDR Block:
10.1.0.0/16
✅ Step 2: Create Subnets
10.1.1.0/24– Public (Web: Nginx)10.1.2.0/24– Private (App: Tomcat)10.1.3.0/24– Private (DB: MySQL)

✅ Step 3: Setup Internet Gateway + NAT
IGW for public subnet (Nginx)
NAT Gateway for public subnets (Web)


✅ Step 4: Configure Route Tables
Public Route Table:
0.0.0.0/0 → IGWPrivate Route Table:
0.0.0.0/0 → NAT
✅ A. Public Route Table Configuration
I created a Route Table named
web-rt.I associated the public subnet (used for Nginx) with this
web-rt.Then, I edited the route in
web-rt:Destination:
0.0.0.0/0(this allows internet traffic)Target: Internet Gateway (attached to the VPC)
This allows public instances like Nginx server to access the internet directly.
🔒 B. Private Route Table Configuration
I created another Route Table named
private-rt.I associated both private subnets (one for Tomcat app and one for MySQL DB) with this
private-rt.Then, I edited the route in
private-rt:Destination:
0.0.0.0/0Target: NAT Gateway (deployed in the public subnet)
This setup allows private instances to access the internet only for updates (e.g., apt install), without being exposed to incoming public traffic.


✅ Step 5: Launch EC2 Instances
🌍 Web Tier (Nginx)
EC2 in public subnet
Installed Nginx
Acts as Reverse Proxy forwarding to Tomcat
SG allows ports: 80 (HTTP) and 8080 (proxy)
🛡 Bastion Host
EC2 in public subnet for SSH access to private EC2s
SG allows port: 22
⚙ App Tier (Tomcat)
EC2 in private subnet
Installed Apache Tomcat
SG allows traffic only from Nginx EC2 (Web SG)
💾 DB Tier (MySQL)
EC2 in private subnet
Installed MySQL, secured
SG allows port 3306 only from App Server

🔐 Step 3: Private Server Access via Public EC2 (Jump Server Method)
Since App and DB servers are in private subnets, I used the Web Server (Public EC2) as a jump host to access them.
Steps Followed:
SSH into Public Web Server using
.pemfile:ssh -i "my-key.pem" ubuntu@<public_ip>Created a new file using:
vim jump.pemPasted the private key of the internal servers (App/DB) in
jump.pem.Changed permission:
chmod 400 jump.pemThen, from the public server, logged in to private server:
  ssh -i jump.pem ubuntu@10.1.2.97  # App Server
  ssh -i jump.pem ubuntu@10.1.3.105 # DB Server
✅ This way, I securely accessed private servers using the public EC2 as a jump point.
🌐 Nginx Installation on Web EC2 Instance (Public Subnet)
After launching the Web EC2 instance (in the public subnet), I connected to it using SSH with the default Ubuntu user. Then I installed and configured Nginx as follows:
🔧 Steps Performed:
SSH into EC2 Instance:
ssh -i "keypair.pem" ubuntu@<Public-IP>Update the System Packages:
sudo apt update -yInstall Nginx Web Server:
sudo apt install nginx -yStart the Nginx Service:
sudo systemctl start nginxEnable Nginx to Start on Boot:
sudo systemctl enable nginx
🚀 Tomcat Installation on App EC2 Instance (Private Subnet)
On the App Server EC2 instance (launched in the private subnet), I installed and started Apache Tomcat to host Java-based web applications.
Since Tomcat requires Java, I installed JDK first, then downloaded and configured Tomcat.
🔧 Steps Performed:
Update System Packages:
sudo apt update -yInstall Java Development Kit (Required for Tomcat):
sudo apt install default-jdk -yDownload the Latest Tomcat (Version 11.0.9):
wget https://downloads.apache.org/tomcat/tomcat-11/v11.0.9/bin/apache-tomcat-11.0.9.tar.gz.ascExtract the Downloaded Archive:
tar -xvzf apache-tomcat-11.0.9.tar.gzStart the Tomcat Server:
  ls
  cd apache-tomcat-11.0.9.tar.gz
  ls
  cd bin
  ./startup.sh

🛢️ MySQL Installation on DB EC2 Instance (Private Subnet)
On the Database Server EC2 instance (placed in the private subnet), I installed MySQL Server to manage the backend database of the application securely.
🔧 Steps Performed:
Update System Packages:
sudo apt update -yInstall MySQL Server:
sudo apt install mysql-server -yStart and Enable MySQL Service:
  sudo systemctl start mysql
  sudo systemctl enable mysql

⚙️ MySQL Configuration on DB EC2 (Private Subnet)
After installing MySQL on the DB Server (private subnet), I performed additional configuration to allow internal app server access by setting the bind-address to the server’s private IP.
🔐 Step 1: Login to MySQL as Root User
To securely access MySQL, I logged in using the root user:
sudo mysql -u root -p
(You’ll be prompted to enter the root password set during secure installation.)
🛠️ Step 2: Edit MySQL Configuration File
I modified the MySQL bind-address to allow access from the app server (within the VPC):
sudo vim /etc/mysql/mysql.conf.d/mysqld.cnf
Inside this file, I located the following line:
bind-address = 127.0.0.1

And changed it to my DB EC2’s private IP, for example:
bind-address = 10.0.2.15
✅ This step ensures MySQL accepts connections only from internal sources (e.g., the app server), not from the public internet — keeping the database secure.

🔄 Step 3: Restart MySQL to Apply Changes
sudo systemctl restart mysql
🔗 Network Connectivity Testing (Ping & Telnet)
To ensure all the instances in my 3-tier architecture (Web, App, and DB) are properly connected and communicating within the VPC, I performed two essential network checks:
✅ 1. Ping Test (Initial Connectivity Verification)
Before running any application-level commands, I verified the basic connectivity between all EC2 instances using ping.
From Web (10.1.1.44):
Ping to App server (
10.1.2.97)Ping to DB server (
10.1.3.105)
From App (10.1.2.97):
Ping to Web server (
10.1.1.44)Ping to DB server (
10.1.3.105)
From DB (10.1.3.105):
Ping to Web server (
10.1.1.44)Ping to App server (
10.1.2.97)
📝 All ping tests were successful, confirming that the subnet routing and security group rules were correctly configured for basic communication.

✅ Verifying Internal Connectivity using Telnet in 3-Tier Architecture
To ensure all components in the 3-Tier Architecture (Web, App, and DB) can communicate with each other, we use the telnet command to test port-level connectivity.
Below is how each instance should verify connection with others using Telnet:
🔹 From Web Server (Public Subnet - IP: 10.1.1.44)
Check connectivity to App Server (Tomcat):
telnet 10.1.2.97 8080Check connectivity to Database Server (MySQL):
telnet 10.1.3.105 3306
🔹 From App Server (Private Subnet - IP: 10.1.2.97)
Check connectivity to Web Server:
telnet 10.1.1.44 22Check connectivity to Database Server:
telnet 10.1.3.105 3306
🔹 From DB Server (Private Subnet - IP: 10.1.3.105)
Check connectivity to Web Server:
telnet 10.1.1.44 22Check connectivity to App Server:
telnet 10.1.2.97 8080
✅ If Telnet successfully connects (i.e., blank screen or "Connected"), it confirms that the port is open and reachable from that instance.
❌ If Telnet fails (i.e., "Connection refused" or "Unable to connect"), check Security Groups, NACLs, and Routing Tables.


📝 Conclusion
This project demonstrates a successful deployment of a secure and scalable 3-tier architecture on AWS using Nginx (Web), Tomcat (App), and MySQL (DB).
It follows best practices for network isolation, access control, and modular application deployment in a cloud environment.